Bespoke battlefield tour following 2nd Seaforths at Arras & the Somme
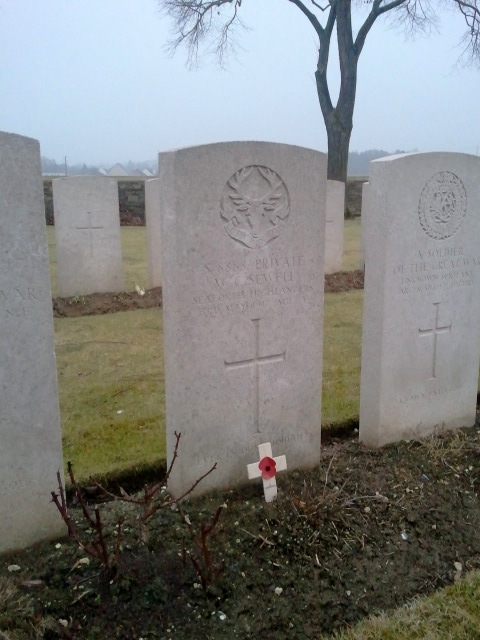
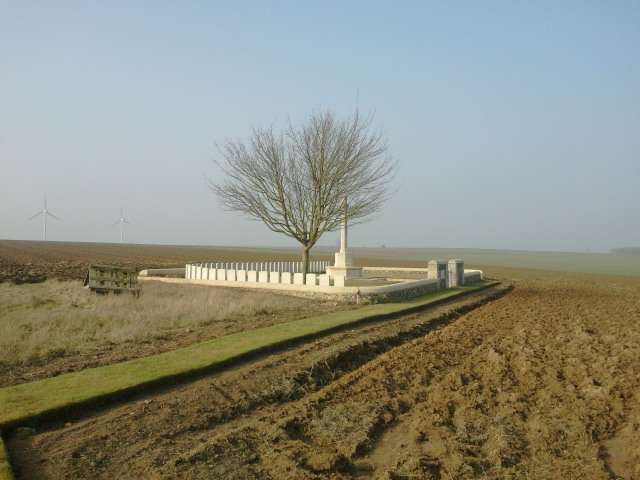
From 2 – 4 March I was guiding a private battlefield tour. Late last year I had been asked to compile a report on S/8888 Private William Charles Sewell who served in the 2nd Battalion Seaforth Highlanders. William Sewell went overseas in November 1915, served through the Somme in 1916 and was killed at Roeux during the Battle of Arras on 3 May 1917. As well as compiling a detailed report on William Sewell’s war service I was asked to take his great nephew, Paul Carter with his friends to follow in William’s footsteps from Arras down to the Somme.
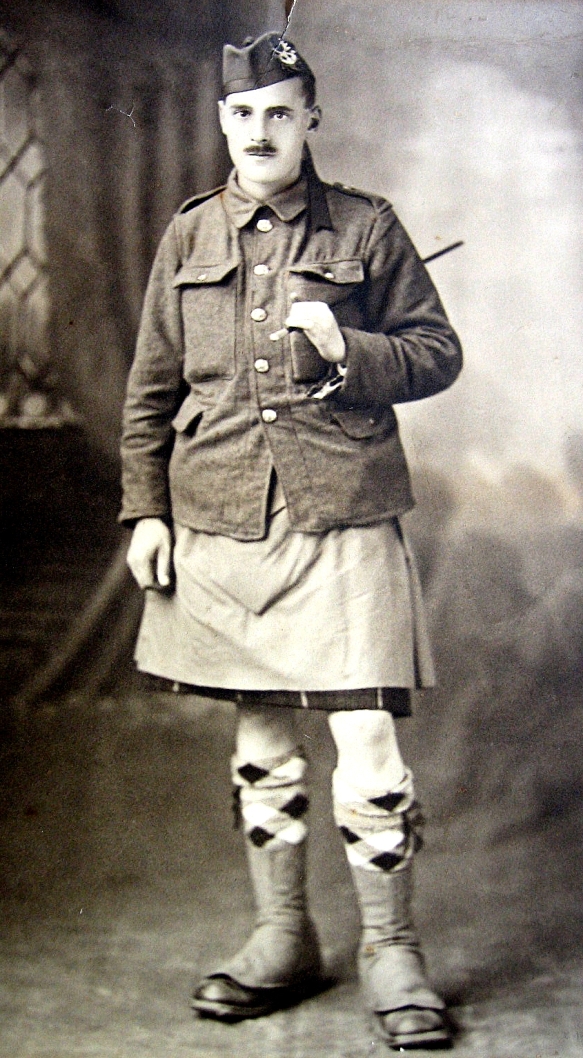
Private William Charles Sewell, 2nd Battalion Seaforth Highlanders. Killed 3 May 1917 during an attack at Roeux during the Battle of Arras. Many thanks to Paul Carter for his permission to use this photo.
Despite a distinct lack of decent weather for the entire trip we had a wonderful time and it was a real honour to be guiding the first member of William Sewell’s family to ever visit his grave. Starting at Vimy Ridge and the Memorial Park we began our tour of the Arras battlefields. After a stop at La Targette for the enormous French and German cemeteries we picked up the Athies road, following in the footsteps of the triumphant 9th (Scottish) Division in their advance on 9 April 1917. After a quick stop at Point du Jour Cemetery and the 9th (Scottish) Division memorial we headed to Fampoux, tracing the route of the 4th Division as they leapfrogged the Scots that day. Stopping at the Seaforths Cross at the Sunken Lane I explained the disastrous attack on 11 April 1917 and read an account of the operation from Private James Stout, a survivor of the attack. As one of those actions that holds a particular fascination for me it was all the more poignant being there with a relative of a soldier who may well have taken place in that ill-planned venture. The following account provides a bleak picture of subsequent events:
At ZERO Hour (12 noon) 2nd Seaforths and 1st Royal Irish Fusiliers advanced, the former on a 3 company front, the latter on a 2 company front. The 2nd Seaforth Highlanders’ objective was the cross roads I.13.a.9.3, exclusive to cross roads I.7.a.4.3 exclusive. Immediately these two battalions advanced, they came under a very heavy machine gun fire from the INN, CHEMICAL WORKS, STATION, CHATEAU and Railway Embankment. The whole ground in Squares H.12 and 18 appeared to be swept by machine gun fire.
At the same time a barrage was put down on FAMPOUX and East of the SUNKEN Road where the remaining two battalions were assembling. This machine gun fire very soon thinned the advancing lines but the troops continued to advance.
On the left, part of a company of the 2nd Seaforth Highlanders entered a new trench some 150 to 200 yards west of the 1st objective, about I.7.c.5.9.
This party under an officer [Lt Donald Mackintosh] maintained itself in the trench for some time, until its ammunition was exhausted, when they were forced back by a counter attack and only a few returned. The remainder, including the officer who is missing, were either killed or wounded, and left in this trench.
The heavy machine gun fire maintained by the enemy made it impossible to obtain information regarding the course of the action but it required no report that a single wave of 400 men who had to advance an average distance of 400 yards with a Battalion front of 1100 yards could not obtain their objectives in face of such machine gun fire and rifle fire.
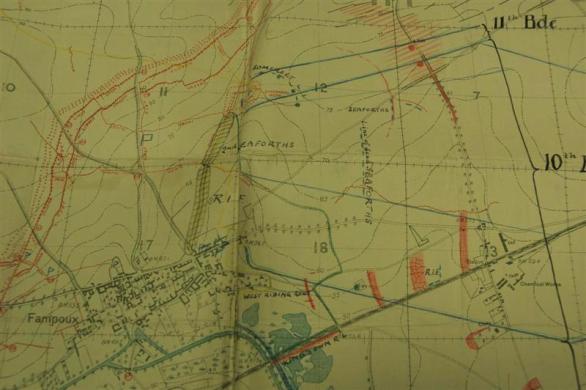
Map extract from 10th Brigade war diary showing 'line of dead Seaforths'. Ref: WO95/1479 10th Infantry Brigade War Diary. Copyright National Archives & reproduced with their permission.
After the debacle of 11 April 4th Division went back for some rest. Their next large-scale attack was the fighting at Roeux on 3 May. It was during this fighting that William Swell was killed. Starting next to the A1 motorway at Crump Trench Cemetery we followed the battalion through their part in the battle. The following map shows the objectives, named respectively the BLACK, BLUE and RED Lines. The total advance was so far as the 4th Division was concerned was to cover a distance of 2500 yards, including:
- The capture of the Northern portion of the village of ROEUX, including the CHEMICAL WORKS and STATION buildings.
- The capture of the trench system on the high ground near HAUSA and DELBAR Woods, and finally
- The piercing of the defences round PLOUVAIN, which were partially wired.
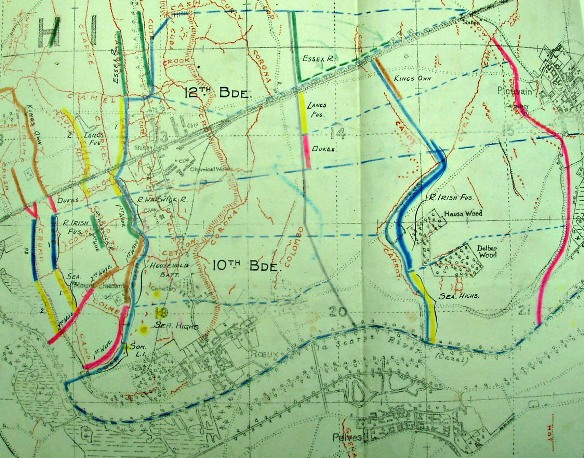
3 May 1917: the 4th Division's attack plan for Roeux . Positions for the 2nd Seaforths can be seen marked in yellow. Ref: WO95/1446 4th Division War Diary. Copyright National Archives & reproduced with their permission.
Of the attack, the war diary notes:
3 May – Zero hour 3.45am when a heavy bombardment of enemy’s position started, lasting for half an hour. Barrage then crept forward very slowly. Battalion left their trenches at 4.30am, being in support to the Household Battalion who were to capture the cemetery north of ROEUX. The Royal Warwickshire Regiment were on the left of the Household Battalion and Royal Irish Fusiliers on left of Seaforths, support to Royal Warwickshire Regiment. 1st Somerset Light Infantry were on the right and were to capture village of ROEUX. On reaching BLUE Line which was just west of DELBAR WOOD the Battalion moved to their right until left of each wave was opposite NW corner of DELBAR WOOD where a halt was made until ZERO + 85 = 5.10am when they advanced to capture the RED line, east of DELBAR and HAUSA WOOD, and immediately west of PLOUVAIN, through I.21.b. and I.15.d & b. This attack unfortunately failed owing to both flanks being held up and severe losses, and later on the whole Brigade line was forced to withdraw to original front line. The Battalion came back to CRETE Trench. This was the position until dark when the Battalion was sent to relieve the Household Battalion in CEYLON Trench from its junction with CORONA Trench I.19.a.8.7. to its junction with COX Trench I.19.a. 7.3. Company Sergeant Major Fraser was in charge of the line as all officers taking part in these operations had become casualties. The Commanding Officer, Adjutant, Medical Officer and three other officers became casualties of the same shell.
Delbar and Hausa Wood no longer exist. Le Lac Bleu (Blue Lake) now covers the ground on which the woods sat. Unless there is specific personal testimony it is notoriously hard to pinpoint the exact spot that a soldier was killed. However, as most casualties were sustained between the BLUE and RED lines it seems likely that William Sewell was killed in this area. Having followed the route of advance we returned to the ground between Fampoux and Roeux to pay our respects at William Sewell’s grave.
Crossing the Scarpe we drove up in Monchy-le-Preux and up Infantry Hill where I recounted the story of 14 April attack by the 1st Essex and Newfoundlanders and the resulting action of the small band of men who saved Monchy from German recapture. For our last stop of the day we headed to the Arras Memorial to Missing.
Next morning began with a windswept walk on the Hindenburg Line to the quiet delight of Rookery Cemetery and Cuckoo Passage Cemetery, the latter full of men of the Manchester Regiment killed on 23 April 1917.
We then headed back into Arras for a good tour of the underground boves and tunnels at Wellington Quarry. Our brief visit to Arras was now at an end as we headed south down to the Somme battlefields.
Our first stop was the Sheffield Memorial Park and the Gospel Copses at Serre (the 2nd Seaforths held the frontline trenches here in November – December 1915). We then headed to Redan Ridge to look at the part played by the 2nd Seaforths in the opening day of the Battle of the Somme, 1 July 1916. The operation plan was for 11th Brigade to take Munich Trench and then for 10th and 12th Brigades to pass through them at a given time and gain the final objective along the Beaucourt Ridge (2nd Seaforths were part of 10th Infantry Brigade)
The war diary offers the following explanation of events:
Zero at 7.30am. From 5.30am the very intense bombardment concentrated on the German trenches in front. At 7.30am the 11th Brigade moved forward from our front in waves.
By 8.45am no messages had come through from 11th Brigade. Patrols advanced and were met by heavy machine gun fire. Telephone to Brigade HQ was out so two orderlies were sent for orders. As they had not arrived by 9am – the hour appointed for the Battalion advance – the remainder of the Battalion moved forward.
On coming into view of the German trenches the Battalion came under heavy machine gun fire from the front and direction of Beaumont Hamel. After passing the German front, parties pushed forward and reached the third line of trenches. Other parties of our men may have reached Munich Trench but there was no possible communication and none returned.
By this time 11th Brigade had already lost their Brigadier, General Prowse (died of wounds) and all four Commanding Officers (killed). Enemy held first, second and third lines on our left and right. Attempts were made to consolidate the ground gained. Enemy bombed on flanks and the third line was given up at about 1pm.
By 11am there were only 5 officers left with the battalion and casualties were proportionately heavy in the ranks. During the evacuation of the third trench Drummer Ritchie sounded the Charge with the idea of encouraging these waverers who had lost their leaders. This gallant action in addition to his conduct throughout the day gained him the Victoria Cross.
We finally withdrew at about 5pm to original front line positions south of the Quadilateral. At this time there were about 40 men of the battalion left.
The war diary records the following casualties:
| Officers | Other Ranks | |
| Killed | 12 | 59 |
| Died of wounds | 1 | 6 |
| Wounded | 8 | 260 |
| Missing, believed killed | 0 | 1 |
| Missing | 0 | 53 |
| TOTAL | 21 | 379 |
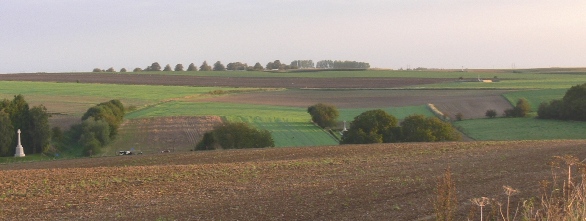
Redan Ridge viewed from a position on the Hawthorn Ridge. The German-held village of Beaumont Hamel is to the right of frame.
Further stops that afternoon included the Sunken Lane at Beaumont Hamel, scene of the infamous attack by 1st Lancashire Fusiliers on 1 July, Newfoundland Memorial Park with its preserved trenches and the Ulster Tower and Thiepval Memorial to the Missing. We finished by following the front line by Authuille Wood to Ovillers, down Mash Valley and then to the hotel at Albert.
Our final day dawned in thick fog which made pointing out sites rather difficult. Beginning with a stop at Fricourt and the Bois Francais we followed the British front line and saw the site of Siegfried Sassoon’s Military Cross action before heading to the site of the Livens Flame Projector site at Mametz. Dropping down to Devonshire Cemetery we headed toward Maricourt and the junction with the French Army on 1 July. Passing Trônes Wood, Guillemont and Ginchy we headed to the desolate fields between Lesboeufs and Le Transloy for our last in-depth look at the part played by the 2nd Seaforths during the Somme battle. Fighting in desperate mud with a thick mist (not unlike the weather on the day we visited) the battalion took place in two attacks in mid-October against German positions in Dewdrop and Rainy Trench. The Battalion war diary recorded the ground conditions in the area:
From Montauban eastwards the whole country is one stretch of absolute desolation – a more gloomy sight I have never seen. The ground is just a maze of shell holes, varying from size of stokes mortar crater to the size of a crater made by a 15-inch.
The attacks on the 14th and 23rd were pressed with utmost gallantry but typical resolute defence from German troops allied to the dreadful ground conditions encountered made any serious advance impossible.
After a walk around Delville Wood and a stop at Flat Iron Copse Cemetery and the Welsh Dragon Memorial at Mametz Wood we ended up at the Glory Hole at La Boisselle where I was able to show them around site and take them underground in W Adit. It had been a real pleasure spending time with these gentlemen. Thanks to Paul Carter and his friends Tim Halliday, Al Kendall and Richard Johnson for making me so welcome. I hope that we can do it again sometime soon – perhaps Ypres next time?
Thank you very much for the wonderful report on my Great Uncle William Sewell and the tailor made trip following in his footsteps 97 years later. Your local knowledge, historical expertise and professional service gave my small group a fantastic tour- better than we could have hoped for. The stories of individual’s personal experiences brought an extra dimension to the trip and brought to life briefly a few of the thousands of names inscribed on memorial walls or grave stones. We all agreed that trip would have been so much less of an event if we had tried to find our own way around, and we would have missed so many significant points. The battlefield overlays and WW1 panoramas were fantastic to relate to as we stood in the centre of all those events and you recounted the events played out. On our journey back there was plenty of talk about the next trip – until then! Paul Carter
I know all four of us found the experience fascinating, thought provoking, educational and frequently moving as well. Your own passion and knowledge of a crucial era in our history was captivating and I am sure like me, the other guys have been singing your praises to those they have talked to about the trip. It certainly was a weekend to remember. Al Kendall

